github地址:https://github.com/openai/shap-e
一、项目介绍:
OpenAI发布全新隐式text-to-3D模型Shap-E,速度依然炸裂,不过生成性能略有不足。去年12月,OpenAI曾发布Point-E模型,只需几秒钟即可根据文本生成3D资产,相比竞品模型DreamFusion提速大约600倍。最近OpenAI再次发布了一款升级模型Shap-E,相比基于点云的显式生成模型Point-E,Shap-E直接生成隐函数的参数来渲染纹理网格和神经辐射场,收敛速度更快,在更高维的多表示输出空间中实现了更好的样本质量!
论文链接:https://arxiv.org/pdf/2305.02463.pdf
二、环境安装
- 平台:windows 10
- 编译器:pycharm
- cuda 11.3
- cudnn 8.2.0.53
conda create -n retinaface python=3.8
conda activate retinaface
pip install -r requirements.txt
三、执行代码
# 输入图片生成3D模型
sample_image_to_3d.ipynb
# 输入文字生成3D模型
sample_text_to_3d.ipynb
四、核心代码
# sample_image_to_3d.ipynb
import torch

from shap_e.diffusion.sample import sample_latents
from shap_e.diffusion.gaussian_diffusion import diffusion_from_config
from shap_e.models.download import load_model, load_config
from shap_e.util.notebooks import create_pan_cameras, decode_latent_images, gif_widget
from shap_e.util.image_util import load_image
[12]
device = torch.device('cuda' if torch.cuda.is_available() else 'cpu')
[13]
xm = load_model('transmitter', device=device)
model = load_model('image300M', device=device)
diffusion = diffusion_from_config(load_config('diffusion'))
[14]
batch_size = 4
guidance_scale = 3.0

# To get the best result, you should remove the background and show only the object of interest to the model.
image = load_image("example_data/dog.jpg")

latents = sample_latents(
    batch_size=batch_size,
    model=model,
    diffusion=diffusion,
    guidance_scale=guidance_scale,
    model_kwargs=dict(images=[image] * batch_size),
    progress=True,
    clip_denoised=True,
    use_fp16=True,
    use_karras=True,
    karras_steps=64,
    sigma_min=1e-3,
    sigma_max=160,
    s_churn=0,
)
  0%|          | 0/64 [00:00<?, ?it/s]
[15]
render_mode = 'nerf' # you can change this to 'stf' for mesh rendering
size = 64 # this is the size of the renders; higher values take longer to render.

cameras = create_pan_cameras(size, device)
for i, latent in enumerate(latents):
    images = decode_latent_images(xm, latent, cameras, rendering_mode=render_mode)
    display(gif_widget(images))
# sample_text_to_3d.ipynb
import torch
from shap_e.diffusion.sample import sample_latents
from shap_e.diffusion.gaussian_diffusion import diffusion_from_config
from shap_e.models.download import load_model, load_config
from shap_e.util.notebooks import create_pan_cameras, decode_latent_images, gif_widget
device = torch.device('cuda' if torch.cuda.is_available() else 'cpu')
xm = load_model('transmitter', device=device)
model = load_model('text300M', device=device)
diffusion = diffusion_from_config(load_config('diffusion'))
batch_size = 40
guidance_scale = 15.0
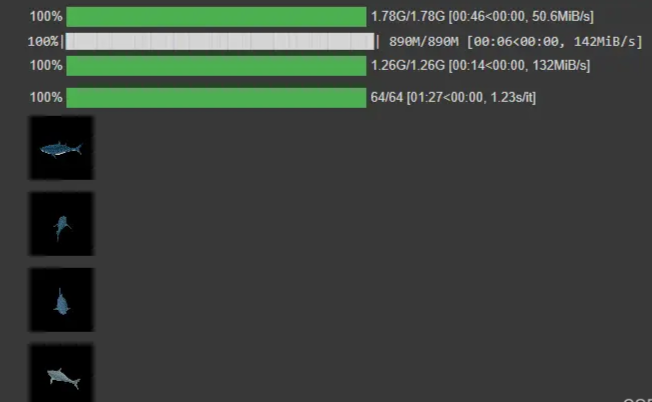
prompt = "a shark"
latents = sample_latents(
batch_size=batch_size,
model=model,
diffusion=diffusion,
guidance_scale=guidance_scale,
model_kwargs=dict(texts=[prompt] * batch_size),
progress=True,
clip_denoised=True,
use_fp16=True,
use_karras=True,
karras_steps=64,
sigma_min=1e-3,
sigma_max=160,
s_churn=0,
)
render_mode = 'nerf' # you can change this to 'stf'
size = 64 # this is the size of the renders; higher values take longer to render.
cameras = create_pan_cameras(size, device)
for i, latent in enumerate(latents):
images = decode_latent_images(xm, latent, cameras, rendering_mode=render_mode)
display(gif_widget(images))
# Example of saving the latents as meshes.
from shap_e.util.notebooks import decode_latent_mesh
for i, latent in enumerate(latents):
t = decode_latent_mesh(xm, latent).tri_mesh()
with open(f'example_mesh_{i}.ply', 'wb') as f:
t.write_ply(f)
with open(f'example_mesh_{i}.obj', 'w') as f:
t.write_obj(f)
五、效果展示
六、总结
由于是生成3D模型,所有需要运行的显卡配置比较高,我这里是用RTX3090 24G的显卡,显卡配置好的同学也可以尝试部署运行